Saturday, 30 April 2011

Hameul Pajeon

Ahh, the Korean seafood pancake! From the first time I had it in our local Korean restaurant, I was hooked. The simplest form is makde with flour, water, a little egg and shredded spring onions. It's so easy that I've even made it on a yacht at 45 degrees heel - admittedly, the cooker was on gimbals. My only difficulty is making it thin enough; over the years I have added more and more batter until it has come out quite thick and glutinous. Recently I went back to Little Seoul and ordered it again, and realised that while it is a thicker pancake than a crepe, it is still thin enough to cook through when crisped up on both sides. Therefore I suggest using a pancake pan rather than a frying pan, and only add enough extra ingredients as your batter can take. The recipe below serves four people as a side dish or starter.

Ingredients:
For the pancake:
  • 1 egg
  • 1 cup plain all-purpose flour
  • 1 cup cold water
  • 5 medium spring onions
  • 1/2 cup of cooked brown shrimp or other small seafood, drained of any excess water
For the dipping sauce:
  • 1/4 cup of medium soy sauce (or diluted down dark soy sauce)
  • 1/2 clove garlic, finely minced
  • 1/2 spring onion, finely minced
  • 1 tbsp rice wine vinegar
  • 1 tbsp toasted sesame oil
  • 1/2 tsp chilli flakes (optional)

Combine the dipping sauce ingredients, whisking gently so the oil is mixed through. Leave to the side while you prepare the pancakes so that the flavours can mellow together.

Break the egg into a bowl and whisk until the yolk and white are combined. Add in half the flour and a quarter of the water and whisk until smooth. Add the rest of the flour and water and combine into a fairly smooth batter, but don't over-beat or the gluten will become tough. Clean, top and tail, slice along the length of the spring onions, and roughly shred, separating the layers. Stir into the batter.

Heat a few tbsp of vegetable oil in a pancake pan until shimmering. Pour in the batter and spread out to the edges with a spatula. Add the shrimp and push them into the batter with the spatula. Cook for about five minutes on a moderate heat, until the bottom is golden brown. Either flip carefully with a large slice-spatula, or slide onto a plate and quickly overturn back into the pan. Cook for a further 3-4 minutes until the other side is done. Rest for a minute or two before slicing into strips or triangles and serve with the dipping sauce.

Tempura


Tempura are the lighly and fluffy deep-fried batter-coated vegetables and seafood often served as a starter in Japanese restaurants. As my dad sadly observed, now that we can make them so well at home, we no longer need to go out to eat them! There are a few tricks to cooking them, which we have perfected over the years:

  • The batter should be barely combined, not whisked until smooth, so that the gluten does not become tough;
  • The batter should be kept cold, preferably suspended in a bowl of ice and water;
  • Slice the vegetables so that they evenly cook, i.e. have similar thickness all over;
  • Some vegetables benefit from being 'flowered' so that the batter clings better;
  • The oil should be at least the depth of the size of your vegetables;
  • The oil should be about 190 C; if you don't have an oil thermometer, a cube of bread should take 10 seconds to go crisp and golden;
  • A rack over the wok helps to drain the oil back into the pan for re-use.


Making cuts in the courgette pieces
so the batter clings better
Tonight we used sweet potato for the first time; cut to a half cm thickness, they cooked beautifully and were sweet and tasty. We bought a single medium-sized squid from the fishmonger and sliced the body into rings, and the tentacles and the fins into a few chunky pieces.

We also used courgettes; I decided to try a new way of cutting them as I had had poor results with them in sticks or slices before. I topped and tailed them, sliced them lengthwise, scooped out the seeds, sliced them lengthwise again, and then across into four pieces, making 16 flattish pieces from the single courgette. Then I took a small sharp knife and cut small triangles out along the edges, so that the pieces came out like little combs or fern leaves. This made the batter cling better, cook a little faster, and of course was rather pretty!

Sweet potato and courgette tempura
The batter should be made in a 1:1 ratio of flour to water, which should be ice-cold. If you use sparkling water, you should either defroth it somewhat, or leave the batter to rest for half an hour so some of the bubbliness is gone. If you use it straightaway, sometimes all the carbonation coes out at once, and in the resulting explosion the batter can become separated from the vegetables! Our Japenese cooking book demands 'tempura flour'; when I looked up what this consists of, it is just any plain white wheat flour - preferably a finely milled one for lightness. Nowadays this means any plain white flour from the supermarket will do perfectly fine.

When making the batter, the flour and water should be combined in a few swift strokes, with a butter knife or a pair of chopsticks. Don't use a fork, as it will fill up with flour and you'll end up overmixing the flour as you try to get the goobery bits out. Stop stirring the flour and water together as soon as you can no longer see any dry flour; don't worry if there are small lumps as they'll work themselves out. You can leave the batter to rest, or not; we've not found that it makes any real difference. Just make sure it stays cold.
Squid tempura

After all this preparation, making tempura is simple. A few at a time, drop your vegetables into the bowl of batter, moving around the pieces to make sure they are well coated. Lift a piece out with a pair of tongs, shake off any large excess of batter, then place gently in the hot oil. Cook only a few pieces at a time to avoid dropping the oil temperature too low. Remove to a rack suspended over the wok and then to a bowl lined with paper towel. Ideally, serve immediately, but even when preparing as a side for just four people, you will probably end up with a few soggy ones at the bottom. Maybe there's a good reason to go out to eat tempura every so often, after all :)

Quick Roast Venison and Vegetable Medley


This is a quick and easy way to cook a piece of tender lean venison, like a loin or fillet. This meat can often be tricky to cook as it is very low in fat, so can go dry easily. The method here seals in all of the juices and serves it with a rich medley of vegetebles and bacon to make every bite nice and moist. We served it tonight with steamed beans and carrots, sauteed baby courgettes and fluffy roast potatoes but any seasonal vegetables and parsnip mash or creamed celeriac and potato, or Yorkshire puds would also be delicious.

Ingredients:
  • 800 g venison fillet or loin of venison
  • 150 g fatty lardons
  • a punnet of mushrooms, sliced
  • 1 large leek or two small white onions, finely chopped
  • 1 large clove of garlic
  • 3 tbsp plain flour
  • a wineglass of red wine
  • a wineglass of chicken stock (use low-salt boullion if you have to make from powder)
  • half a bunch of tarragon
  • 3 tbsp redcurrant jelly

Preheat the oven to 220 C; remove the meat from the fridge an hour before you want to cook so that it reaches room temperature. In an oven-safe frying pan, sear the meat on all sides to seal it and then place in the oven for 10 minutes. Remove and cover with foil for 10 minutes, and save any juices to add to the gravy.

To make the accompanying gravy, fry the lardons until crisp and golden, then remove. Fry the mushrooms in the fat, and remove when they have reduced and softened. Soften the onions or leeks in the same pan, adding more oil if necessary. Crush in the garlic and stir in the plain flour and cook for a further two minutes. Deglaze the pan with the red wine. Replace the mushrooms and lardons, stir in the chicken stock, tarragon and redcurrant jelly and bubble for a few minutes until thickened. Season to taste. Slice the venison into bite-size pieces and place on a platter, topping with the vegetable medley. Don't worry if it looks rare as you slice it; it should be served pink and will darken as soon as it is put on a plate.

Thursday, 28 April 2011

Pasta Primavera

A lovely meal to cook in the spring and adapt throughout the season, this relies on a good assortment of fresh vegetables, a few storecupboard tricks and a piquant cherry tomato sauce. Our family adaptation is to add a little seafood - usually some smoked or boiled prawns, or a few flakes of smoked fish, or in this case some succulent sauteed scallops. This serves six hungry people- you can see my dad getting ready to tuck in :)

Ingredients:

  • 1 kg fresh spring vegetables like baby sweetcorn, sprouting broccoli, green beans, asparagus, shelled broad beans, peas etc
  • half a pack of dried porcini mushrooms
  • 200g pine nuts
  • 2-3 punnets of cherry tomatoes
  • 4 cloves of garlic, peeled and crushed
  • 1-2 dried chillies
  • Enough fresh linguine for 6
  • 6-12 large fresh scallops
  • Parmesan cheese

Steam or parboil the vegetables until blanched and crisp. Cover the mushrooms in boiling water and a plate, and soak for 20 minutes. Toast the pine nuts over a low to moderate heat in a non-stick frying pan, until they are golden brown.

Slice half of the cherry tomatoes in half and the rest into quarters. Finely chop the chilli(es) and add with the garlic into a few tbsp of hot olive oil in a deep frying pan, and add the quartered cherry tomatoes thirty seconds later. Allow the tomatoes to collapse gently, over about five minutes, then add the halved cherry tomatoes and cook for a further five minutes. (Two different cuts of tomatoes will give the sauce more texture.)

Set the pasta on to a rolling boil in a slightly salted water. Melt together a tbsp of olive oil and a small slice of butter in another frying pan, and when it is hot and beginning to go gold, add the scallops. Sautee for two minutes on each side, until golden brown. Drain the linguine and toss with the vegetables and plenty of grated Parmesan, seasoning with a good grinding of black pepper. Serve in a large dish topped with scallops, alongside small bowls of spicy tomato sauce for people to add, and more Parmesan if desired.

Monday, 25 April 2011

Chinese Steamed Sea Bass and Egg-Fried Rice

After a long but quite fun drive up to Edinburgh, we had a cup of tea, a stroll and then made this light and delicious meal for four - my sisters had yet to arrive. Originally there was an official recipe in an official book, but  that has disappeared into the mists of time, and now this is an improvisational recipe doable with whatever springs to hand. I've done this with red mullet, flavoured with spring onions, shavings of root ginger and coriander stems. Tonight we go for something a little deeper-flavoured, as the weather up here is about 15 C cooler than the Southern heatwave!

Ingredients:
For the fish:
  • 4 fresh sea bass or bream
  • a few tbsp of fermented black beans
  • 3 balls of stem ginger in syrup
For the rice:
  • 300g white (basmati) rice
  • 3 spring onions
  • 2 eggs, lightly beaten
  • a cup of frozen peas
  • soy sauce
For the vegetables:
  • any good stir-friable vegetables, like baby sweetcorn, sugarsnap peas, red or yellow peppers, chinese leaf, water chestnuts, bean sprouts, mushrooms, etc
  • 150 ml chicken stock
  • 50 ml cold water
  • 2 tbsp cornflour

Gut, scale and clean the fish, and slash two or three times across the fattest part of the meat. Finely dice the ginger and stuff the fish with it and the black beans. Wrap in foil and bake at 180C for 30 minutes, or put in a steamer and steam for 20 minutes.

If you like, clean the rice with a few rinses of cold water -- I don't, but my dad does! Simmer in twice as much water until cooked through, and drain if necessary. Leave aside to cool a little. Heat a deep frying pan with peanut or refined sesame oil, and once shimmering, add the rice and toss about to fry. Roughly chop the spring onions, move the rice aside and add them to the pan, with a little more oil if necessary. Once they are cooked, move them aside and pour in the eggs, again with a little more oil if needed. Allow to cook through on the bottom, then flip over and fry the other side. When it is nearly cooked through, break it up with a spatula. Add the cup of peas and combine all the ingredients together. Splash over a little soy sauce and serve immediately.

For the vegetables, stir fry them in order of decreasing cooking time, cooking things like carrots and peppers at the beginning, and soft things like beanspouts and greens just at the end. Each time, add your vegetable selection, toss about at a high heat, then add a few tbsp of chicken stock and cover to steam-cook. Mix the cornflour into the cold water, and when you run out of stock and vegetables, add this, bring up to a simmer and allow to reduce to a light sauce. Taste and season with fish and soy sauce if needed.


Thursday, 21 April 2011

Potato, Feta and Rosemary Frittata

Last night we popped over to Teri-aki with some friends; it's almost our default restaurant in Cambridge, with a nice range of sushi, sides and big noodle plates when you have an appetite. It once had a sister restaurant called Aki-teri, which served more Korean-style dishes including my favourite dolsot bibimbap. Unfortunately the owners converted it into a bar, which I think is a shame. On the plus side I can get my kimchi fix at Little Seoul.

Tonight we needed to pack for a five-day Easter weekend seeing my family in Edinburgh, so as usual there were a few things to use up before we departed. A couple of potatoes, yet more cheese from the SO's dairy-based shopping spree, some sad carrots and spring onions from the bottom of the fridge, juice that would certainly ferment if we left it, and of course somehow we'd accumulated two dozen eggs. So I thought for a bit, browsed the internet, thought some more, popped out and filched some rosemary from a neighbour's front garden (well, it overhangs the pavement!) and created this! Serves four - preferably outdoors with a glass of white wine.

Ingredients:

  • 2 large or 3 medium new potatoes
  • 3 fat sprigs of rosemary
  • a bunch of spring onions
  • 200g feta cheese
  • 8 eggs

Scrub the potatoes, then cut into large even chunks, and simmer for 15 minutes until tender but not falling apart. Run under cold water until cool, then slice into half-cm-thick slices. If some parts are overcooked and show signs of falling apart, just slice them a bit thicker. In a heavy based stainless-steel pan that is safe under a grill, fry the potatoes in hot olive oil for 3-4 minutes on each side, until golden brown and crisp-edged. These don't need to be perfect, like sautéed potatoes; it's fine if they break up a little or aren't perfectly evenly toasted. It's still a good idea not to crowd the pan; I found I needed to cook them in two batches. Remove to a plate when they're done, turn the heat off, and add a little more oil to the pan if it has all been absorbed.

Cut or break the feta cheese into small pieces. Strip and finely chop the rosemary leaves, and roughly chop the spring onions, separating the layers so they're not in big pieces. Fry the spring onions and rosemary in the pan you used for the potatoes, tossing about for a couple of minutes so they become green and fragrant. Crumble in the feta and return the potatoes to the pan; combine gently until the components are mixed but not broken up.

Break the eggs into a large bowl and use a fork to break the yolks and combine them somewhat with the whites. Season well with black pepper; you won't need salt if your feta is fairly salty, as it usually is. Pour the egg mixture into the warm pan over the other ingredients and resist the urge to stir or flatten it out. Turn the heat back on to a low setting, and cook for 15 minutes, until it's only the top that is still runny. Preheat your grill to a moderately high setting, then move the pan under it and grill for 3-4 minutes, until puffed and golden. Allow to rest for a minute or two before serving.

We ate this tonight with a side of sliced carrots cooked in orange juice (use just enough to cover and simmer with a tsp of tarragon for 15 minutes), and a few stalks of chard cooked in their own juices for a couple of minutes, seasoned with toasted caraway seeds and lemon juice. All the better for being eaten outside in the garden. And the leftovers will keep us going during the long drive tomorrow.

Macaroni & Cheese

Saturday night we ate out in the delightfully kitsch Trafford Centre, opting for pan-Asian cuisine at Tampopo. The food was very good for a reasonable price, and they had those lovely large spiced Indonesian prawn crackers and a good selection of Asian beers. Then we hit the mini-golf and Laser Quest; I narrowly won the former, and as a team we utterly destroyed the opponents in the latter. Although one team did consist of a slightly overweight dad and two small children, and were essentially cannon-fodder. Hellstorm, Punky Fish and Captain Atom ruled the day ;)

Sunday we visited the scenic caves of Stockport, then had a relaxing drive home, taking the scenic route over the Peak District via Chesterfield, later driving through the low-traffic neon streets, which to me is like driving in some sort of utopian future. Having eaten a big carvery lunch, we refueled on the go with oranges and cereal bars, getting back in to Cambridge for a bowl of filled pasta before bedtime. Driving's still pretty exhausting for me, and Monday I awoke very tired, so in the evening I craved easy comfort food and an early night. As we had almost nothing in the house it was difficult to figure out something to cook in my tired state, but after a few minutes I realised I had a perfect set of ingredients for the ultimate comfort food.

Ingredients:
  • 300 g of dried pasta, preferably small and tubular
  • 1 small white onion
  • a couple of bay leaves
  • 350 ml milk
  • a wedge of butter
  • 1 tbsp plain or cornflour
  • 175 g soft white goat's or sheep's milk cheese
  • a few slices of old bread or the end of a baguette
  • parmesan

Preheat the oven to 200 C. Boil the pasta in plenty of water for its packet cooking time. Peel and halve the onion, and put it and the bay leaf and milk in a pyrex bowl or pan. Microwave or heat for 10 minutes, watching toward the end so that it does not boil over. When it comes close to the boil, remove from the heat. Microwave the butter in another pyrex jug or bowl until melted, then stir in the cornflour. Discard the onion from the milk, and a few tbsp at a time, stir the hot milk into the roux, until you have a white sauce. Microwave for a further minute, to bring back up to heat; it doesn't need to thicken in the jug.

Drain the pasta, break the cheese into small pieces, and combine them gently in a shallow casserole dish. ( I like to only just cover the bottom of a shallow dish, rather than stack up lots of pasta in a deep one; that way everyone gets more crispy topping!) Season with black pepper, then pour over the white sauce. Using an electric blender, whiz the bread until you have rough breadcrumbs; sprinkle these over the top, and then add a little finely grated parmesan. Bake in the oven for 20 minutes, until crisp and golden. Serve with a lemony spinach salad or sliced ripe tomatoes with a splash of balsamic vinegar.

Wednesday, 20 April 2011

Guest Dish: Tray-Baked Chicken and Crushed Pots

This weekend we visited a friend of ours from our college days in Cambridge, and his lovely girlfriend. On the Friday night, I was totally zonked from driving for four hours during one of the busiest times of year, so couldn't help make any dinner. But it was no problem; he prepared this meal single-handedly in about half an hour, and it was absolutely delicious. I think it's a Jamie Oliver recipe; the SO guessed immediately because of the presence of cherry tomatoes. I've reconstructed the recipe from the dish itself, and portioned it for two.

Ingredients:

  • 2 chicken breasts
  • 4-6 slices of streaky bacon
  • a handful of cherry tomatoes on the vine
  • fresh tarragon, thyme and rosemary
  • a few cloves of garlic
  • 4-6 medium waxy potatoes
  • 2-3 spring onions
  • a big bag or bunch of fresh spinach
  • a few tbsp crème fraîche

Preheat your grill to a high setting. Wrap the bacon around the chicken and in a non-stick pan, sear it quickly to seal the flesh. Place in a wide casserole dish or baking tray, add the cherry tomatoes on the vine, the fresh tarragon and thyme, crush in the garlic, and toss with a little olive oil. Grill for 10 minutes each side, until the bacon is crisp and the chicken is cooked through.

Meanwhile, parboil the whole potatoes for about 5 minutes, until just beginning to show tenderness. Sautee them whole with the rosemary, in olive oil over a moderate heat, and crush them downward with a potato-masher to break them into flattened ovoids. Turn once or twice so that you get plenty of good crispy bits.

Roughly chop the spring onions and sautee in a little olive oil. Rinse the spinach, add to the spring onions, cover and cook it briefly in its own juices. Remove, squeeze out the water, return to the pan, stir through the crème fraîche and heat through. Dash over a grating of nutmeg and season to taste.

Friday, 15 April 2011

Smoked Trout and Asparagus

Yesterday I was very tired and just threw together a variant on pasta-with-something-delicious: roasted peppers, leftover barbecued aubergines, a good handful of some toasted pine nuts, parmesan and torn basil leaves. Collapsed in front of The Squid and the Whale and got an early night. Today was equally quick, using up a few things in the fridge before we visit friends all weekend - yes, that means another three days without updates!

I've mentioned before that the local fishmonger does a very good smoked mackerel. Last weekend when shopping for the barbecue, we actually arrived early enough to find that he also does a very good smoked trout. The first local asparagus have just appeared, so we bought one bunch. Tonight I make a simple salad with a potent dressing to contrast the smoky flesh of the trout, and some tiny roast potatoes (with rosemary and duck fat, mmm) to dispel the chill of this spring evening. Croutons would also work well; hopefully I will find some time to post my recipe here now that the weather is warming and I'm preparing salads more frequently.

Ingredients:
  • 1 smoked trout (or other chunky smoked fish)
  • 1 bunch of asparagus
  • a few mild lettuce leaves
  • a handful of chopped parsley
  • juice of one lemon
  • 2 tbsp mayonnaise
  • 1 1/2 tsp dijon mustard
  • 2 tbsp good olive oil
  • 1 tbsp capers

Set your potatoes or croutons going first. Skin the trout and tear into large pieces. Steam the asparagus over a rolling boil for 3-4 minutes, until bright green and al dente, then drain and run under cold water to reduce the temperature. Roughly chop the lettuce. Combine the rest of the ingredients in a small pyrex bowl and give a good whisking to make a thick and powerful dressing. Serve the trout atop the vegetables, with the dressing poured over, with croutons atop or potatoes alongside.


Wednesday, 13 April 2011

"Thai" Beef Salad

In honour of my local, which uses the words "Authentic Thai" to qualify its Cuisine, and therefore implies neither. This is a salad I vary every time I make it, using whatever ingredients are to hand and have the right balance of flavours in my head. There are thousands of variants of this recipe on the internet; I've seen ingredients that look authentic, like bean sprouts and coriander leaf, and ingredients that look crazy, but probably aren't, like aubergine and tomato. Tonight I try the latter for the first time and I'm surprised by the result... in a good way. Oddly I don't think it would be quite right with cherry tomatoes, and its certainly a good idea not to overuse them.

For the dressing, fish sauce is absolutely key. Lime juice can just about be substituted by lemon, and while you'd miss the umami of soy sauce, you could just about use salt instead. But nothing substitutes for fish sauce - it hits all the right notes here. You can use any kind of toasted nuts; I prefer the salty ready-roasted kind for this, but toasted cashews or macadamias would be tasty too. Alternatively you can omit them and put a few tbsp of peanut butter or tahini in the dressing; it's amazing. Chillies are optional for the faint-hearted.

Ingredients:

  • 1 tasty rump or sirloin steak (or 2 if you're feeling greedy)
  • juice of 2 limes
  • soy sauce
  • a large bunch of bulky, mild greens, like English round lettuce, Chinese leaf (napa), young chard, or a very light spring cabbage, or a small cucumber, seeds removed
  • a small handful of bitter greens, like rocketradicchio or chicory, or a handful of sugarsnap peas
  • a ripe red tomato, a handful of grated carrot, some beansprouts, or a few red radishes
  • a small bunch of mint
  • a small bunch of fresh coriander
  • 2 tbsp fish sauce
  • 2 tbsp extra-virgin sesame or rapeseed oil
  • 1 red chilli
  • a handful of roasted peanuts

In a very hot pan with a bare smear of vegetable oil, sear the steak on each side for 1 1/2 minutes, so it is browned on each side but still rare in the centre. Put in a bowl or some foil, and juice over one of the limes and add 2 tbsp of soy sauce. Marinade for at least an hour; ideally for 24 hours.

Roughly chop the greens, and strip the leaves from the herbs and finely chop. Slice the tomato or radishes into bite-sized pieces. Finely chop the chilli (remove the seeds if you like a milder heat) and whisk with the juice of the remaining lime, 2 tbsp of soy sauce, the fish sauce, and the oil.

Toss the salad ingredients with half of the dressing. Remove the steak from the marinade and slice against the grain as thinly as you can. Serve the salad with a portion of sliced beef and some peanuts on top, pouring over the rest of the dressing as you do so. Goes well with rice or noodles and extra soy sauce alongside. (Tonight we made coconut rice by adding a few tbsp of coconut cream, 1 tsp sugar and 1/2 tsp of salt to the rice's cooking water... yum! And the sneaky SO snapped a photo of me slicing the beef...)

Sunday, 10 April 2011

Focaccia

A classic Italian bread widely adopted in the UK, focaccia makes a lovely accompaniment, being soft, gently flavoured and of an open texture well-suited to mopping up juices or eating with soft cheeses. Perfect with the barbecue we held in some surprisingly beautiful April weather! Once again I prefer to use a small starter for this bread, as I find it gives a more rounded flavour and reliable result.

Yesterday I experimented with some toppings, and the recipe I give below includes an improvement over my results: increasing the flavour adhesion by kneading some topping back into the dough before adding the rest as topping. You could of course vary the topping, or make them without and they would be just as delicious. I also used a braid technique to open the texture and give a marbled result; instead one could make the classic 'slipper' shape with one rough strip of dough.

Ingredients:
For the starter:

  • 50 ml boiling water
  • 1 tsp sugar
  • 100 ml cold water
  • 1 tbsp active dried yeast
  • 100g wholemeal bread flour
For the dough:
  • 75 ml warm water
  • 65g olive oil
  • 75 ml white wine
  • 1 1/2 tsp salt
  • 2 1/2 tsp dried mixed herbs
  • 500g strong white bread flour

Topping ideas:

  • 2 sprigs of rosemary, leaves stripped and roughly chopped or
  • 100g of green olives, roughly chopped or
  • 75g rehydrated sundried tomatoes, roughly chopped or
  • a bunch of fresh basil or
  • any combination of the above, or whatever you feel like!

Dissolve the sugar in the boiling water, then reduce to blood heat with the cold water, and activate the yeast, giving it 10 minutes to develop a frothy head. Stir in the wholemeal bread flour and leave for a couple of hours in a warm place to rise - it will just about double in size.

In a breadmaker (or by hand in a bowl) combine the starter and the rest of the dough ingredients. Set to dough cycle or knead until soft and elastic. This should be a very soft dough. Allow the dough cycle to complete, or if kneading by hand, give it 30 minutes to rise, knock back, and another 30 minutes.

Lightly flour two baking trays. On a lightly floured surface, knead in half of your topping ingredient. Divide the dough into four equal pieces. Roll and pull two into long strips, slightly longer than your baking tray size. Lay the two strips side by side and put half of the rest of your topping on top, then braid the two strips 'fatly' and roughly over each other with an open weave. Brush lightly with olive oil, transfer to a baking tray and lightly drape a warm damp teatowel over the top. Repeat for the other two strips and remainder of topping. If you like a salty result, you can add flakes of sea salt to the top, but do not mix this into the dough, or it will disrupt the yeast.

Preheat the oven to 190 C and allow the dough to double in size, then remove the teatowels and bake in the hot oven for 20 minutes, giving plenty of room in case the dough rises further. Serve warm and fresh! It keeps for a few days but it's unlikely there will be any left to save!

Dad's BBQ Rice

We're having a little heatwave at the moment, and yesterday I hosted the first barbecue at our house since we moved in... over a year ago :) What can I say - the weather in 2010 was terrible! I prepared some lamb chops, marinaded some aubergines, put together a variant on my cauliflower salad (this time with pumpkin seeds and cranberries, yum!), and made a couple of amazing focaccia.

I also made a big heap of my dad's BBQ-style rice. I love this with any grilled meats: it's a taste straight out of my childhood. It's very simple to make, can be served warm or cool, and can be made several hours ahead. It keeps for a day or so in the fridge, but is best fresh. The secret is to be very patient when frying the onions: use a low heat and give yourself plenty of time. This recipe served 15 people as a small side, with some left over! Would easily serve 8 as the main side.

Ingredients:

  • 3 small or 2 medium white onions
  • 2 tbsp Swiss Marigold vegetable bouillon
  • 400g basmati rice (white or wholemeal; either works)
  • 1 small glass white wine
  • 3 ripe tomatoes
  • 2 generous handfuls almonds
  • 2 generous handfuls raisins

Finely chop the onions and fry in olive oil over a very low heat. They should cook until translucent and beginning to caramelise around the edges: 10-15 minutes. Add the bouillon and rice, stir and cook for a further minute. Pour in the wine and deglaze the pan, then top up with boiling water so the rice and water are at a 2:1 ratio. Cover and simmer for the cooking time of your rice, less one minute. The water should be absorbed so the rice is mostly dry.

Meanwhile, chop the tomatoes into medium-sized cubes, and roughly chop the almonds. Fold these, along with the raisins, gently into the rice, being careful not to break up the grains. Cover and remove from the heat. The tomatoes will soften gently in the residual heat of the rice, the raisins will absorb a little excess water and puff up, and the almonds will freshen a little. Serve warm or cool, within a few hours of cooking.

Peshwari Naan

Naan is a delicious flatbread that is best cooked in an extremely hot oven. Lacking an extremely hot oven, we made do tonight with an extremely hot grill - but didn't leave quite enough space between the pan and the elements! So be aware that if you try this, you'll need a few inches of leeway for the naan dough to expand, or of course you can use an oven. I find it's hard to substitute the yoghurt in naan; it just adds the right tang to the dough. This recipe makes four large naan.

Ingredients:
For the dough:

  • 50 ml boiling water
  • 1 tsp sugar
  • 100 ml cold water
  • 1 tbsp active dried yeast
  • 175g natural yoghurt
  • 1 1/2 tsp salt
  • 2 tbsp melted butter or ghee
  • 450g strong white bread flour

For the filling:
  • 2 generous handfuls of almonds
  • 2 generous handfuls of raisins
  • 75g solid coconut cream or dried coconut
  • 3 tbsp honey

Dissolve the sugar in the boiling water, cool to blood heat with the cold water, then stir in the yeast and leave for 10 minutes to activate. If you have a breadmaker, add the yeasty water and yoghurt to the breadmaker along with the other ingredients, and set to dough cycle. If you don't, combine the ingredients in a large bowl, stir to make a dough, then knead for 10 minutes until soft and elastic, leave for 30 min, knock back and knead again, then leave for 30 further minutes.

Meanwhile, blend the filling ingredients in a food processor - or I guess finely chop them if you don't have one. Pour a little milk into a ramekin and preheat the oven to 250C or the grill to its maximum setting.

Flour a clean surface, and divide the dough in two, then again, and then again, to make eight equal pieces. Roll two pieces as flat and thin as you can, and add 1/4th of the filling to the centre of one, patting it flat with the back of a spoon. Using your fingers, dab some milk from the ramekin around the edges of the piece, and lay another piece over the top. Push together to stick the dough together, and repeat for the other three pairs of pieces.

Put your baking trays in the oven or under the grill, and when they are properly hot, slide the naan doughs onto the trays, and place immediately in the oven or grill. If grilling you might need to flip them halfway through. Cook for 4-5 minutes, until browned. If you like, brush with a little melted butter before serving.

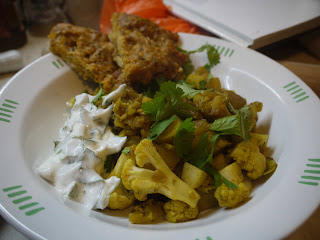
Aloo Gobi

Apologies for the recent lack of posts... I will simply have to make up for it. Now!

Last week the SO headed off on another trip, so while he was away, I munched my way through leftover lasagne. In between days of pasta-based goodness, I was out visiting friends and had two fairly hasty and substandard meals out. It's disappointing when you pay much more than you would spend on food at home, and end up with food you don't enjoy. On Monday we did have the misfortune of choosing a pub which was closing for refurbishment and therefore selling out of meals as fast as we could order them!

Having not been shopping in a week and a half, by the time the SO returned, we were down to very little in the fridge. However that can sometimes be inspiring: from adversity springs creativity! Or in this case, aloo gobi :) This is a nourishing and warming curry which is delicious with rice, but even better with naan or chapatis. I decided to have a little fun and make some peshwari naan, and a rough mint raita. Supplemented with a couple of onion bhajjis from our local Shop of Awesome, it made a surprisingly substantial meal from a nearly-empty fridge!

Ingredients:

  • 1 medium white onion
  • 3 cloves garlic
  • a half-inch piece of ginger
  • 1 tsp cumin seeds
  • 1/2tsp asafoetida
  • 2 small dried chillies
  • 1 tsp turmeric
  • Half a cauliflower
  • 2 medium potatoes, scrubbed
  • a handful of fresh coriander

Finely chop the onion, and in a deep saucepan, gently fry it in a little vegetable oil for 10 minutes, until soft, translucent and beginning to caramelise around the edges. Peel the garlic and ginger, and finely chop them together, then add them to the cooked onions. In a mortar and pestle, pound the cumin, asafoetida and dried chillies together, until they are a little broken up. Add the spices and turmeric to the onion, garlic and ginger, stir and allow to cook for a minute until the spices become fragrant.

Chop the potatoes into small cubes and add to pan, stir through, then add just enough water to cover the bottom of the pan. Turn the heat to low, cover completely and allow to cook gently, stirring occasionally and adding more water if the pan goes dry. Meanwhile, break the cauliflower into florets. When the potatoes are just barely done, fold in the cauliflower and replace the lid, cooking for a further 10 minutes, or until the cauliflower is tender but not collapsed. There should be no liquid at the bottom of the pan: this is a dry curry. Tear over the coriander and serve - preferably with naan or chapatis.

Tuesday, 5 April 2011

Spongeloaf Squarepants

I've been making my own bread for about five years now - with the aid of a breadmaker. I started by following the recipes that came with the bread maker, and then mixing various flour types to see what would happen. I've never tried the 'mixes', just used the essentials: flour, water, salt, yeast; and various adulterants: milk powder, lemon juice, oil, seeds and nuts. This was all fairly haphazard experimentation, and some of my creations were little better than doorstops.

In particular I found it hard to judge the action of the fast-action yeast recommended by all the breadmaker manuals. Sometimes it worked very well, other times it didn't activate at all. It seemed to go stale very quickly, and was very expensive. And too much could make the bread taste yeasty.

One day, probably at a restaurant or cafe, I had a piece of sourdough. I had forgotten the delicious taste; it seems to be really hard to find compared to the less-fermented breads sold by supermarkets and even bakeries. I looked into how to make sourdough, and found some really useful guides: basically, mix some flour and water, leave it alone for a week, and at the end it will probably be alive! Or you can give it a little baker's yeast at the beginning to start it off. Then use half of it each time in place of yeast. So I messed around with that for a bit, and again, got some nice results along with a few briquettes.

Two years ago, a friend of mine gave me a copy of Andrew Whitley's "Bread Matters", which gave an excellent insight into the chemistry of the bread-making process. Now I could see why some loaves failed while others over-rose, and why my sourdough needed to be fed a few hours before making a dough, rather than before being stored as guides had recommended. It also showed why supermarket breads taste so strangely sweet and salty, and how the industrial white bread is made (if you've eaten a lot of it, you probably don't want to know). It is a really brilliant book and I'll try to condense its advice on sourdough another time. I don't currently have a sourdough starter on the go, as life has been somewhat too interrupted to keep a regular cycle of bread-making, which you need in order to keep the starter fresh and alive.

So recently I started looking at sponge breads. A sponge is like the initial starter for sourdough: just a mixture of flour, water, and a little yeast to get it going. You leave it for 12 hours or so, and the yeast divides, digests the flour and becomes active; there's a picture from previous experiments on the left. Then when you combine it with the main ingredients for the dough, the yeast is ready to go and the rising always works well. It also adds a nice depth of flavour since the sponge has time to ferment. And you can see if there's something wrong with your yeast at the start, rather than post-briquette.

My problem was that the extra 12-hour step of activating the starter can be a bit of a pain. But I've found a timetable to get around this, allowing me to put the bread on before going to sleep, and still get an excellent result. This is a great recipe if you've just remembered you need bread tomorrow morning!

Ingredients
For the sponge:
  • 50ml boiling/hot water
  • 1 tsp sugar
  • 75ml cold water
  • 1 tbsp active dried yeast (not fast-action)
  • 100g wholemeal flour
For the dough:
  • 150g wholemeal flour
  • 250g strong white flour
  • 2 tsp salt
  • 2 tbsp vegetable oil
  • 225ml water

Dissolve the sugar in the hot water, then reduce to blood-heat by pouring in the cold water. Stir in the tbsp of active dried yeast and give it 10 minutes to wake up. (Brush teeth... feed cats...)

Pour the yeasty water and the sponge flour into your bread maker and press go on its default programme. Let it churn for a few minutes, until everything is well mixed, then stop it. (Put cats out... awwww, don't give me that look... )

Add the dough ingredients gently, trying not to disrupt the sponge. Keep the salt insulated from the sponge entirely. Set the timer on your breadmaker for the following morning. (Ignore meowing... go to sleep...)

And that's it! Remove and enjoy rough hunks of piping hot bread, or rest it for 10 minutes before slicing neatly. (Let cats back in ... !)

Saturday, 2 April 2011

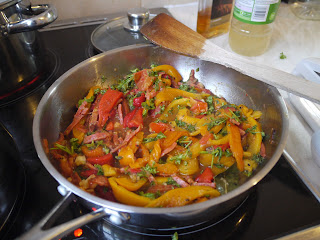
Rotini with Chorizo and Peppers

Another simple meal tonight, using up the last of the contents of the fridge before a busy weekend. While we were baking the lasagne, I used the heat of the oven to simultaneously roast some peppers. As usual I dropped these into a pyrex bowl, covered with a plate and left them for a few hours. When I peeled the skin off, I found they'd also sweated out quite a bit of nice peppery juice, so I decided to save them for a main meal instead of just using them in a side salad. And thus tonight's meal was born.

Ingredients:

  • 300g dried pasta, or enough for two
  • a few inches of chorizo
  • 4 cloves of garlic
  • a pinch of oregano or mixed herbs
  • 1 bay leaf
  • two ripe tomatoes
  • 3 roasted bell peppers, skins removed
  • a generous handful of fresh parsley
  • Parmesan cheese

Cook the pasta for the time required by its instructions. I'm a firm believer in cooking pasta in a big pan of salted water at a rolling boil. The SO likes to just cover it and simmer it, until it all congeals to the bottom of the pan in a soggy mess. Hmm, I wonder if he'll read this.

Slice the chorizo into shapes reminiscent of your pasta; tonight we used rotini (sold as fusili in Sainsbury's) so I sliced the chorizo into thin coins, then lengthwise into strips. Fry in a gentle heat in a trace of olive oil, so the chorizo cooks and colours. (If you're vegetarian, you could replace the chorizo with some pine nuts: toast them in a non-stick pan and add right at the end.)

Crush the garlic into the hot oil, stir, and cook for a further minute. Season well with black pepper and add the bay leaf and oregano: if you're using mixed herbs or dried oregano, just use the barest pinch or everything will taste like pizza sauce. With fresh herbs you can be a little more generous.

Chop the tomatoes and add them to the pan, and any juices from your roasted peppers. If your peppers were fairly dry, you can throw in a glass of white wine, or some chicken stock. Bubble the sauce over a moderate heat for about 5 minutes, until it has reduced and the tomatoes have softened. Tip in the peppers, reduce the heat and allow to just warm through. Finely chop the parsley, combine it through and season to taste. Serve over the cooked pasta, topped with grated Parmesan.

Friday, 1 April 2011

Pumpkin and Goats Cheese Lasagne

One of my two favourite vegetarian lasagne recipes, this combines sweet roasted pumpkin with soft goats cheese and a garlicy tomato sauce into a taste explosion. I've adapted it from my memory of a Nigella Lawson recipe; hers is in her Christmas book and uses butternut squash. As usual, I used a Crown Prince - still £3 per 4 kg pumpkin in the market!

Ingredients:

  • 1.2-1.4 kg good pumpkin, unpeeled weight
  • 2 tsp dried or fresh thyme or rosemary
  • 1 white onion
  • 1 red onion
  • 4 cloves of garlic
  • 1 glass of white wine
  • 2 bay leaves
  • 3 x 400g tins of tomatoes (chopped or plum)
  • 2 tbsp tomato puree
  • 250g of fresh lasagne sheets, or 180g dried
  • 375g of soft, white rindless goat's cheese
  • Parmesan cheese

Peel the pumpkin, discard any string and seeds, and chop into large (~1.5") pieces. Toss with the herbs, 1 tsp of salt and a little vegetable oil; roast at 200C for 35 minutes until tender and caramelised. Meanwhile, finely chop the onions and fry over a low heat for 10 minutes, until softened. Crush in the cloves of garlic and cook for a further minute. Deglaze the pan with the white wine and stir until the alcohol evaporates. Add the bay leaves, tomatoes and tomato purée; cover and bring to a simmer, then cook uncovered for 20 minutes until the tomatoes have broken up and the sauce has reduced by about 10%. Season to taste.

Pre-cook your lasagne sheets if they demand it. Slice the goat's cheese into rough ~cm-thick circles. In a deep lasagne dish, add:
  1. a few tbsp of tomato sauce
  2. lasagne
  3. tomato sauce
  4. half of the roast pumpkin
  5. lasagne
  6. tomato sauce
  7. half of the goat's cheese circles
  8. lasagne
  9. tomato sauce
  10. the rest of the pumpkin
  11. a layer of lasagne
  12. tomato sauce
  13. the rest of the goat's cheese circles
  14. a layer of lasagne
  15. a few tbsp of tomato sauce
  16. a generous grating of Parmesan cheese

(This is why I use a deep lasagne tray!) Cook in the oven at 170 C for 45 minutes, or until golden and bubbling. Rest for at least 10 minutes before cutting: if you can make this an hour ahead, it tastes better for it. It also keeps excellently in a cool place; somehow the flavours become even more sweet and delicious over time. We usually reheat it in pieces in the microwave, but if you plan to make it for guests on the following day, then you can cook it for 35 minutes the first time, chill until needed, then cook again in the oven for 35 minutes, rest for 10 minutes, then serve.

Tonight we served it with a shredded gem lettuce and a splash of balsamic vinegar, and garlic bread. I've never made garlic bread before, so I followed the excellent Joy of Cooking instructions. Take a baguette and slice it width-wise into circular coins - but don't cut all the way through the bread. Melt a few slices of butter in the microwave, and crush in a clove of garlic per person. Open each gap between the bread 'coins' and spoon in a little garlicy butter. Wrap in foil and bake at 200 C for twenty minutes, then bring to the table and unwrap in a cloud of garlicy steam. Yum!